The world as we know has seen an unprecedented shift of perspectives & narratives. Gone are the very hectic early mornings when my home literally was a Tsunami hub. Tearing away from my bed and scuttling to grab the newspaper before rushing to the kitchen, there would be a frenetic rush to pack it all before the clock struck 8! And as we scurried out of our homes for work/school, I would breathlessly mouth a resolve to plan better for the next day. The next day of course would be a reflection of the previous day. And then the pandemic struck! Along with it came the new challenges of working from home. And I was secretly thrilled that the morning rush will be finally put to rest. Alas! The day still is the same maddening rush as we all get ready by 8 to be sucked into the digital world.
The digital world has blurred all lines of distinction vis-a-vis professional & personal time.


Even as we slowly get accustomed to the new normal, the paradigm shift has got with it a fresh set of glasses to look into the future. It certainly makes sense to appreciate all the things which we took for granted earlier.
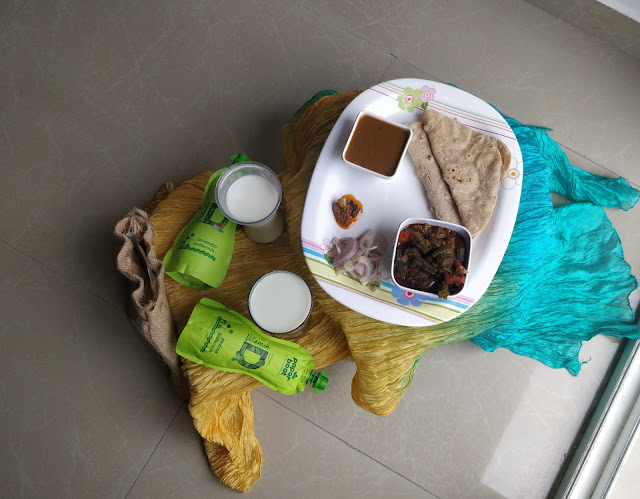
Thank God some things have not changed. Like, Paper Boat's latest offerings of Butter Milk in 4 yummy flavors. The familiar jute bag carrying these drinks sent comfort shivers across me.

The package had the four variants of buttermilk – Coriander, Southern Masala, Jeera and Pudina.

Paper Boat's Buttermilk range is power packed with Vitamin D. It contains 50% of the daily requirement of Vitamin D and Vitamin B12. A disclaimer that one shouldn’t drink more than two packets in a day stands out!

The Pudina & Coriander variants were enjoyed with an elaborate North Indian lunch.

What works in favor of the drinks is that it is free of preservatives, added color and has added minerals. And that’s why their drinks taste so distinct.
What could be improved:- While the Pudina flavor packed an edgy flavor compared to the Coriander, we would have preferred a bit more flavor on both the drinks to showcase the flavor better. Further to differentiate the drinks, there could have been some colour difference. Currently, kept side by side, it is not identifiable as to which is the Pudina and which is the Dhania flavored buttermilk.
Overall, the buttermilk from the house of paper boat is a refreshing change. Served chilled, the drink relaxes you.
Coming up: Southern Masala and Jeera.


